In this step by step tutorial, we are going to learn how to build a real-time Android Chat application in Kotlin. Everything is going to take only a few minutes since we are going to reuse the full source code from our premium Android Chat App.
How to Build an Android Chat Application in Kotlin
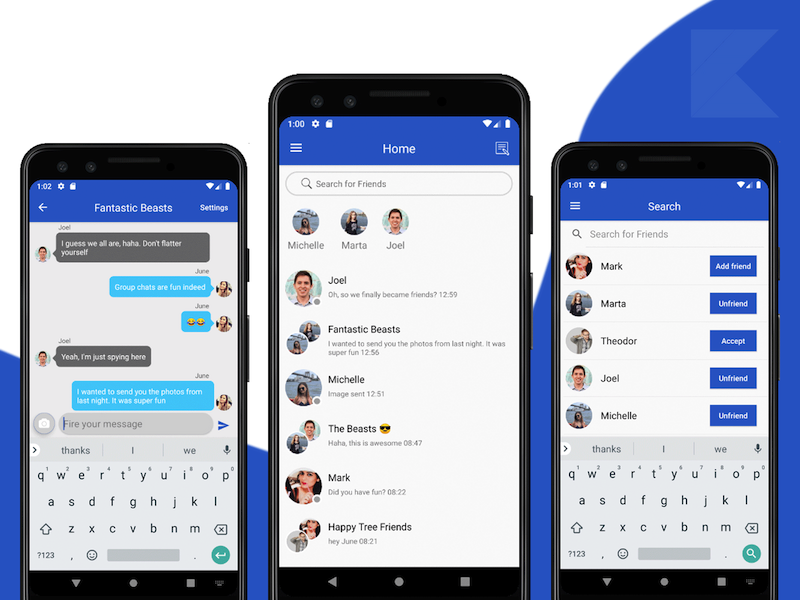
In order to build a fully-fledged Android chat application, we need to include a series of critical core features, such as:
- Real-time Messaging
- Photo Messaging
- Private Messaging
- Group Chatting
- Push Notifications
- Messages Archive
- Online Status
To implement all these awesome critical set of features, we leveraged Firebase backend. More exactly, we are using:
- Firebase Auth for user management (think Login, Registration, Facebook Login, Google Login, etc).
- Firebase Firestore – this is a real-time database where we store all the users and messages
- Firebase Storage – this is used for storing the photos and videos that are being sent directly from our Android chat application
- Firebase Cloud Messaging – this is used for sending real-time push notifications to all recipients of a given message
On a high-level, here are the steps that you need to follow in order to get started with our Android Chat application in Kotlin:
- Open & Run the Kotlin project in Android Studio
- Override google-services.json file with your own file (downloaded from Firebase Console).
This will wire the chat application to your own Firebase account. Don’t forget to enable all Firebase Auth options, as well as Firebase Storage. For Firestore, you also need to make the read/write permissions public. - Publish the app to Google Play Store
It looks pretty straightforward, right? We are going to give you a step by step tutorial on how to achieve all these milestones, including turning on push notifications. In this step by step tutorial on how to build a real-time Android chat application in Kotlin, we are also going to present a high-level overview of the source code structure, as well as common pitfalls and frequently asked questions.
Without further ado, let’s dive right into it.
Enable Push Notifications
In order for your Android chat application to be able to send real-time push notifications to all the recipients of a given message, you need to provide the correct Authorization key, which can be found in Firebase Console.
Head over to Firebase Console -> Your Project -> Project Settings -> Cloud Messaging and copy to clipboard the token of the Server Key. It looks like this
AAAAeliTfEs:APA91bGve5fyExjSiUCB0oI09Br1yGUSb0tPHelAk7L0FUytHWGOMlBPexJubTwSjjJTaIlK7oto3jDevoj9c5Q4Qalk6QEtQ9Y3tYfTxHD7OrmPZuVJjVGGciPBJXThG9QHCZQqx9Id
Now, in Android Studio, open AppConstants.kt file, which can be located under the Utils folder. Replace the SERVER_KEY field with your own authorization token.
Now re-run the project, and send a few messages to see whether the push notifications get sent.